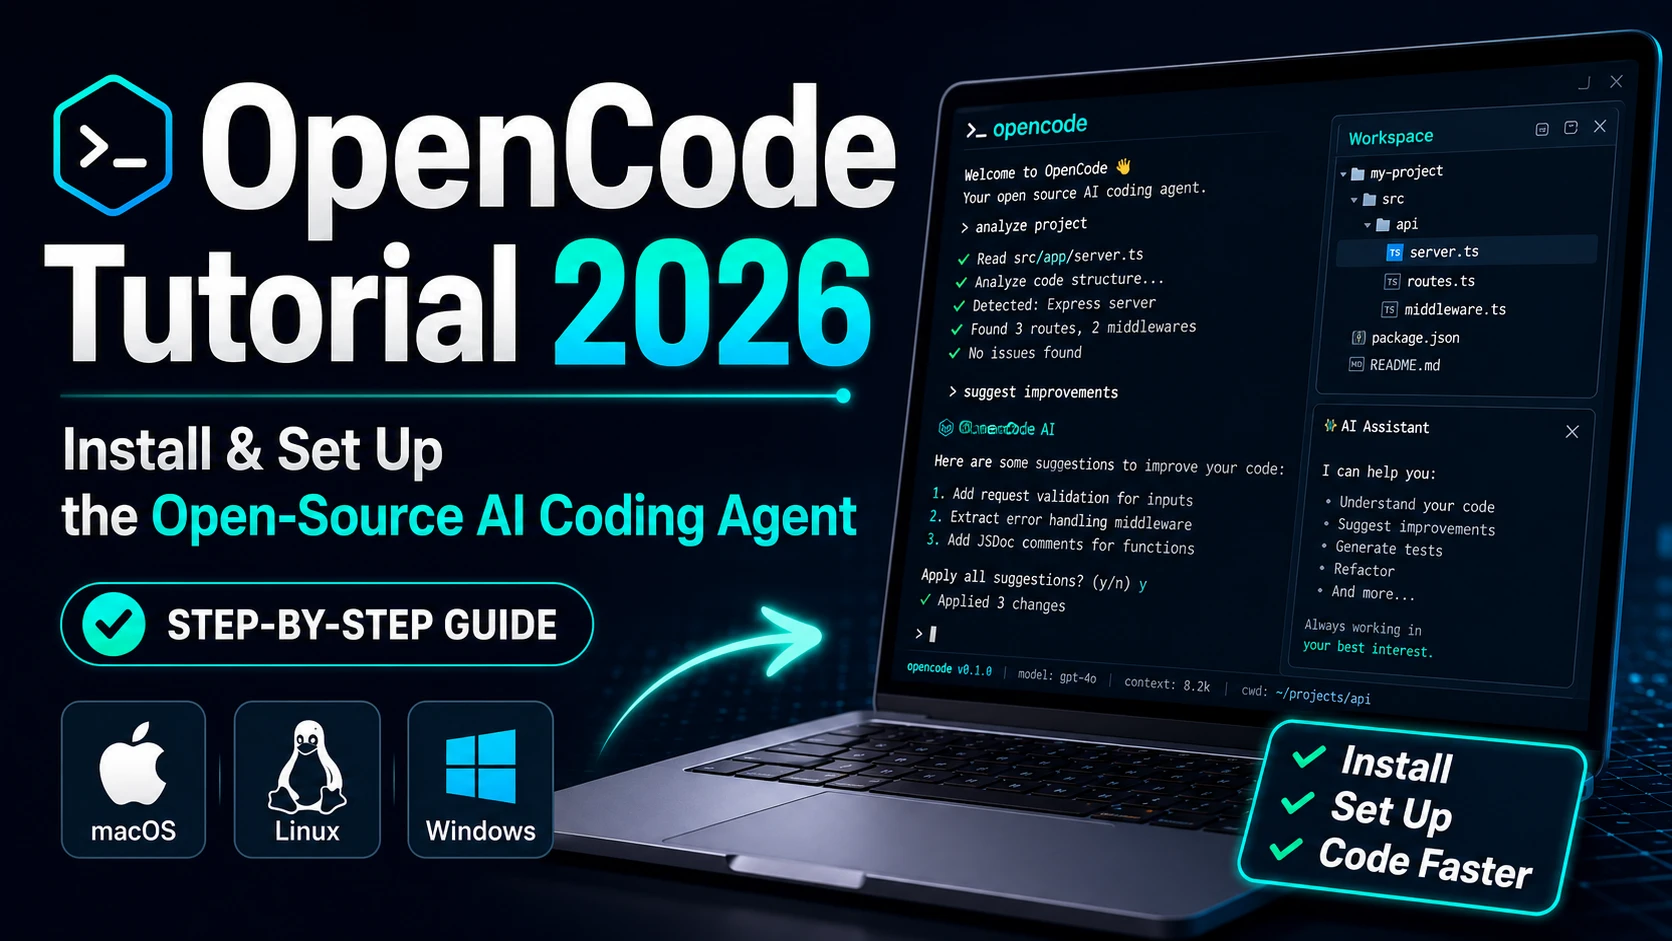
OpenCode Tutorial 2026: How to Install and Set Up the Open-Source AI Coding Agent
A beginner-friendly OpenCode tutorial for 2026. Learn how to install OpenCode on macOS, Linux, and Windows, connect AI providers, configure your project, and start using this open-source AI coding agent from the terminal.
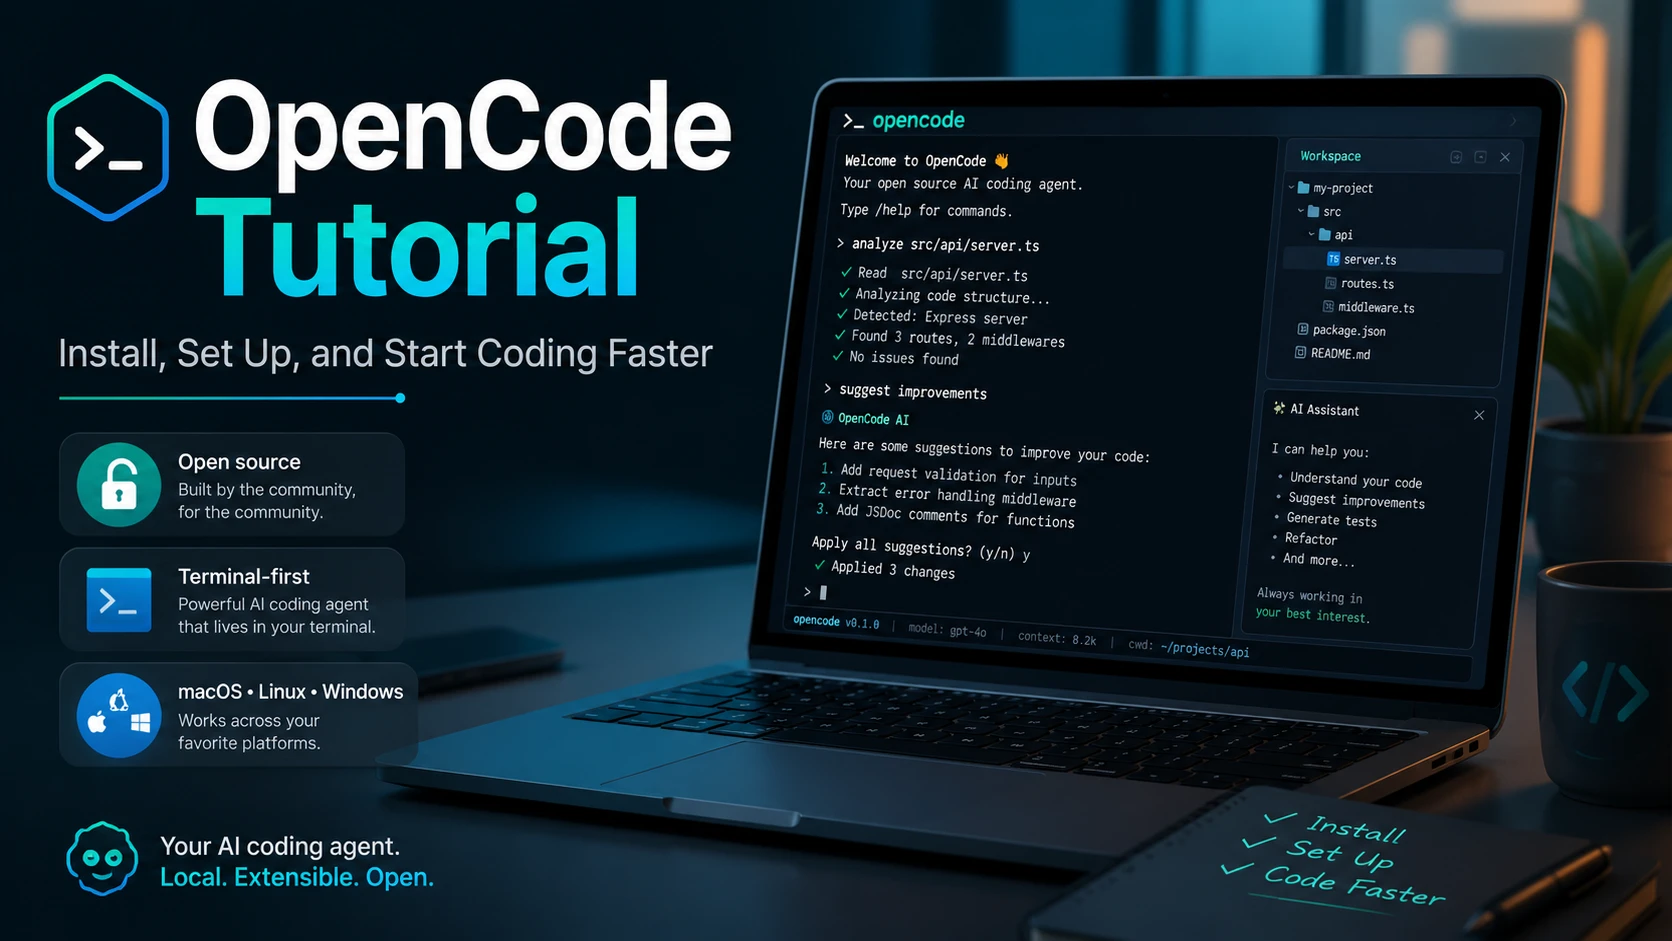
OpenCode is an open-source AI coding agent for developers. It helps you understand code, edit files, refactor functions, debug issues, and work with your project using natural language.
You can use OpenCode from the terminal, and it is also available as a desktop app and IDE extension. For developers who already spend a lot of time in the command line, the terminal interface is usually the fastest way to get started.
This guide shows you how to install OpenCode, launch it for the first time, connect an AI provider, initialize your project, and use it safely in a real development workflow.
What Is OpenCode?
OpenCode is an AI coding agent that runs inside your development environment. You open a project folder, start OpenCode, and ask it to inspect files, explain code, plan changes, or help implement features.
For example, you can ask:
Explain how this project is structured.Find the bug in this authentication flow.Refactor this function and add tests.Review the current git diff for possible issues.Instead of copying code into a separate AI chat window, OpenCode works directly with your local project. That makes it useful for debugging, refactoring, reviewing code, writing tests, and understanding unfamiliar codebases.
Why Use OpenCode?
Developers are looking for AI coding tools that are powerful but still flexible. Some tools are closed-source. Some work mainly with one AI provider. Others are tightly tied to a specific editor.
OpenCode is useful because it gives developers more control:
It is open source.
It works well in the terminal.
It supports macOS, Linux, and Windows.
It can work with many LLM providers.
It supports local model workflows.
It fits naturally into command-line development.
It can help with code explanation, editing, debugging, planning, and refactoring.
If you want an open-source Claude Code alternative or a terminal-based AI coding assistant, OpenCode is worth trying.
OpenCode vs Claude Code
OpenCode is often compared with Claude Code because both are terminal-based AI coding agents.
Claude Code is a polished tool from Anthropic and works especially well if you already use Claude models. OpenCode, on the other hand, is open source and gives developers more flexibility around providers, configuration, and workflow.
A simple comparison:
| Tool | Best For |
| OpenCode | Developers who want an open-source, terminal-first AI coding agent |
| Claude Code | Developers who want a polished Anthropic-first coding experience |
| Aider | Developers who prefer Git-based AI pair programming |
| Cursor | Developers who want an AI-native IDE experience |
OpenCode is not just a Claude Code clone. It is better understood as a flexible open-source AI coding agent for developers who prefer working from the terminal.
Before You Install OpenCode
Before installing OpenCode, make sure you have:
A modern terminal emulator
A project folder to test with
API keys or login access for the LLM providers you want to use
Node.js, if you plan to install with npm, pnpm, Yarn, or Bun
Homebrew, if you prefer installing with Homebrew on macOS or Linux
WSL, if you are on Windows and want the best OpenCode experience
You do not need a complex setup to get started. For most users, installation only takes a few minutes.
Quick Install
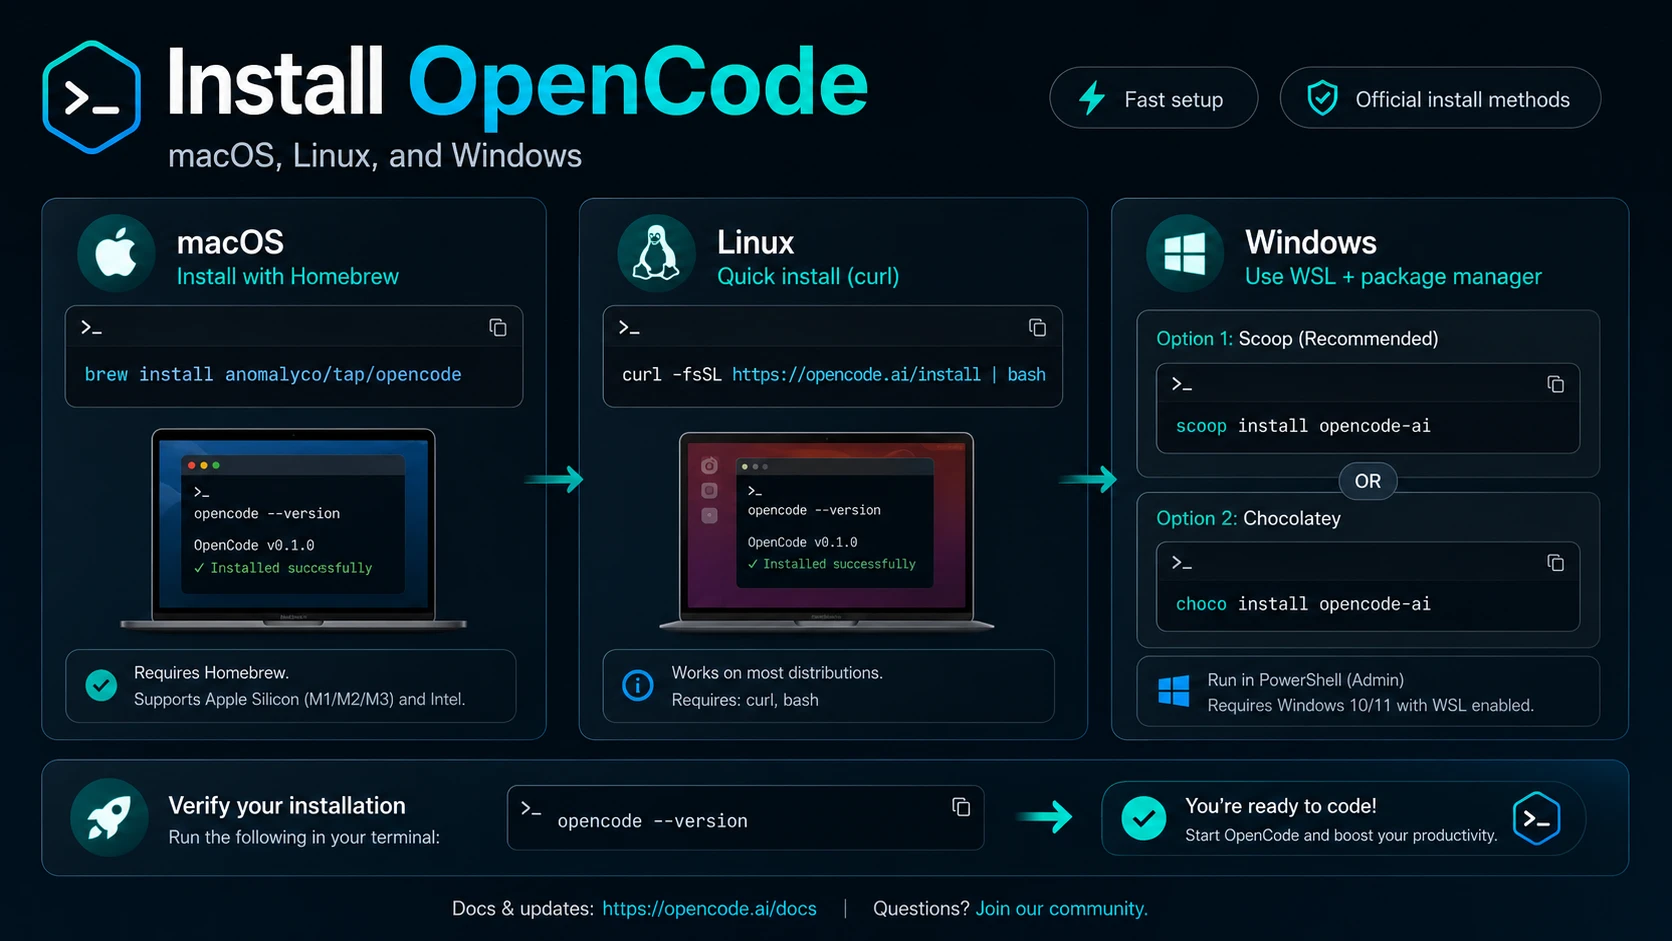
The fastest way to install OpenCode on macOS or Linux is the official install script:
curl -fsSL https://opencode.ai/install | bashAfter installation, check that it works:
opencode --versionThen open a project and start OpenCode:
cd your-project
opencode
If the terminal interface opens, OpenCode is ready to use.
Install OpenCode on macOS
On macOS, you can install OpenCode with Homebrew, the official install script, or Node.js package managers.
Install with Homebrew
The recommended Homebrew command is:
brew install anomalyco/tap/opencodeVerify the installation:
opencode --versionTo update later:
brew upgrade opencodeThere is also an official Homebrew formula:
brew install opencodeHowever, the OpenCode tap is usually the better choice if you want the most up-to-date release.
Install with the official script
curl -fsSL https://opencode.ai/install | bashThen verify:
opencode --versionThe install script is a good option if you do not use Homebrew.
Install OpenCode on Linux
On Linux, the official install script is usually the simplest option:
curl -fsSL https://opencode.ai/install | bashVerify the installation:
opencode --versionIf you see command not found, OpenCode may not be in your PATH. The install script can install OpenCode into several locations, with ~/.opencode/bin as the default fallback.
You can add it to your shell profile:
export PATH="$HOME/.opencode/bin:$PATH"Add that line to ~/.bashrc or ~/.zshrc, then reload your shell:
source ~/.bashrcor:
source ~/.zshrcInstall on Arch Linux
For Arch Linux, OpenCode can be installed with:
sudo pacman -S opencodeFor the latest AUR version:
paru -S opencode-binInstall OpenCode on Windows
OpenCode can run directly on Windows, but WSL is recommended for the best experience.
Recommended: Install with WSL
If you use Windows for development, WSL gives you better terminal compatibility and a more Linux-like development environment.
Inside your WSL terminal, run:
curl -fsSL https://opencode.ai/install | bashThen verify:
opencode --versionOpen your project from WSL and run:
cd /mnt/c/Users/YourName/project
opencode
Install with Scoop
If you prefer a native Windows install, you can use Scoop:
scoop install opencodeThen verify:
opencode --versionInstall with Chocolatey
Run PowerShell as Administrator:
choco install opencodeThen verify:
opencode --versionInstall with npm on Windows
You can also install OpenCode with npm:
npm install -g opencode-aiThen verify:
opencode --versionInstall OpenCode with npm, Bun, pnpm, or Yarn
If you already use Node.js, you can install OpenCode with your preferred package manager.
With npm:
npm install -g opencode-aiWith Bun:
bun install -g opencode-aiWith pnpm:
pnpm install -g opencode-aiWith Yarn:
yarn global add opencode-aiThe package name is:
opencode-ainot:
opencodeThis is a common source of confusion.
If you do not want a global install, you can also run:
npx opencode-ai@latestInstall OpenCode with Docker
OpenCode can also be run with Docker:
docker run -it --rm ghcr.io/anomalyco/opencodeDocker is useful for isolated environments or quick testing. For daily local development, most developers will prefer the install script, Homebrew, WSL, or npm.
Launch OpenCode for the First Time
After installation, open a project folder:
cd your-projectStart OpenCode:
opencodeA good first prompt is:
Explain what this project does based on the file structure.You can also ask:
Find the main entry point of this project and explain how the app starts.Start with read-only questions before asking OpenCode to edit files. This helps you understand how it sees your codebase.
Connect an AI Provider
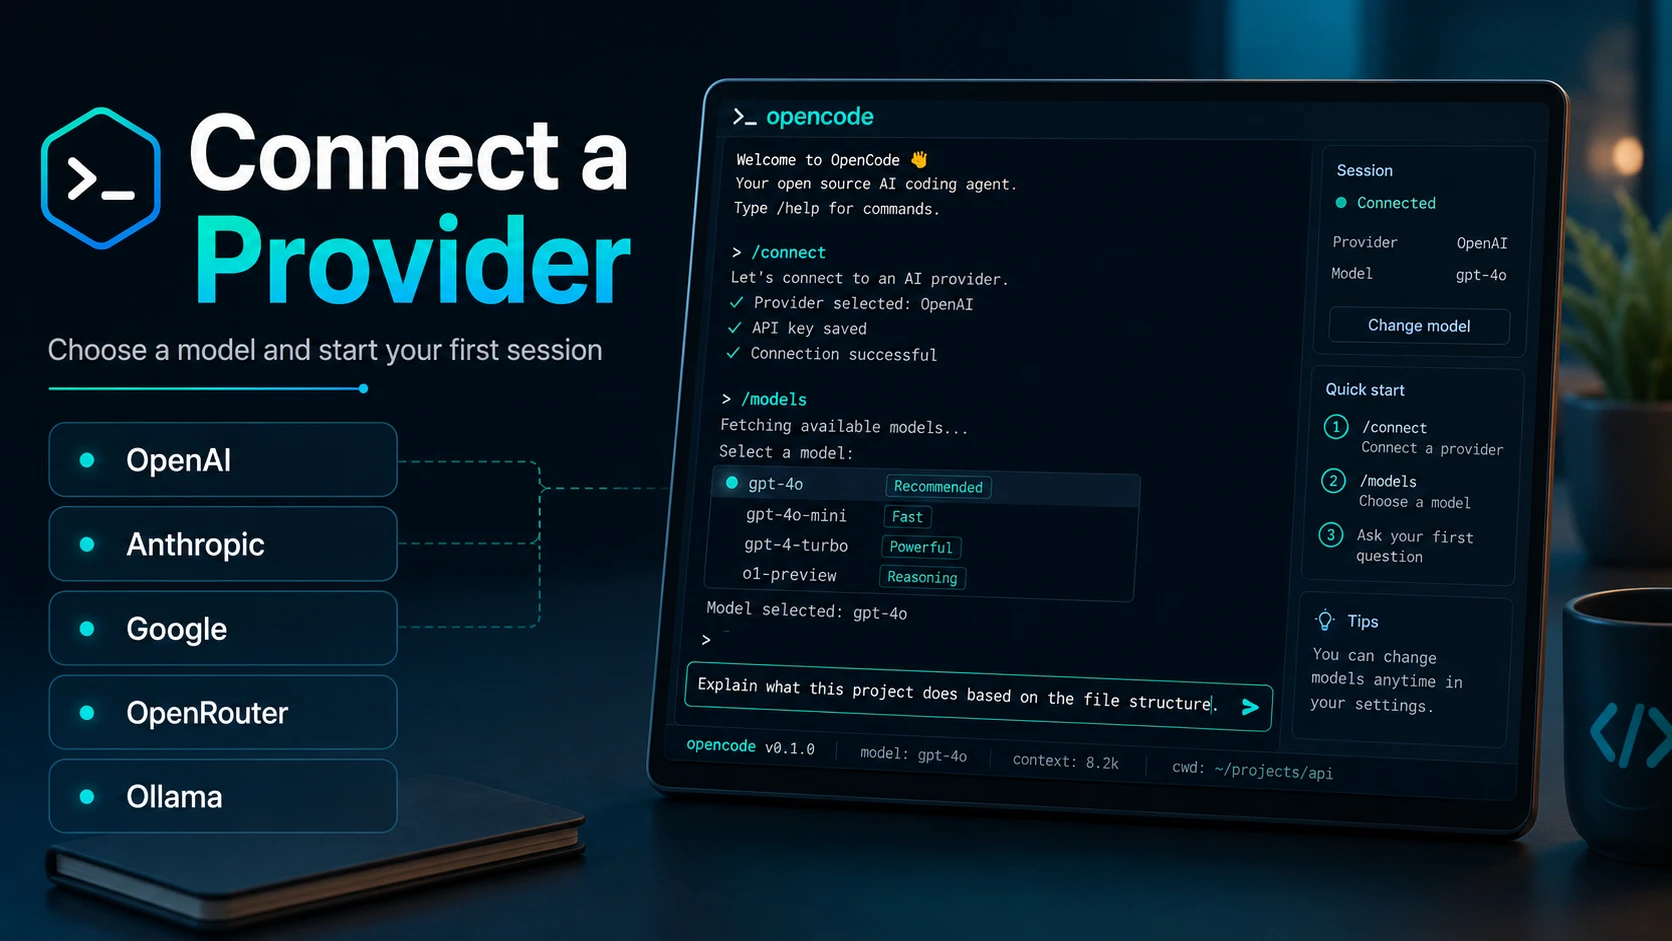
To use OpenCode for real coding tasks, you need to connect an AI provider.
Inside the OpenCode TUI, run:
/connectThen choose a provider and follow the prompt.
OpenCode supports many providers, including OpenCode Zen, OpenAI, Anthropic, Google, OpenRouter, GitHub Copilot, Ollama, LM Studio, and others.
After connecting a provider, you can use:
/modelsto choose the model you want to use.
For new users, OpenCode Zen is a simple starting point because it provides models tested by the OpenCode team. If you already have an API key from another provider, you can choose that provider during the /connect flow.
Your provider credentials are stored locally by OpenCode. Avoid committing API keys or secrets into your project repository.
Use OpenCode with Local Models
OpenCode can also work with local model workflows such as Ollama.
A basic Ollama configuration in opencode.json looks like this:
{
  "$schema": "https://opencode.ai/config.json",
  "provider": {
    "ollama": {
      "npm": "@ai-sdk/openai-compatible",
      "name": "Ollama (local)",
      "options": {
        "baseURL": "http://localhost:11434/v1"
      },
      "models": {
        "llama2": {
          "name": "Llama 2"
        }
      }
    }
  }
}
Local models are useful if you want more privacy, lower API costs, or more control over your AI setup.
They may not always match the performance of top hosted models, but they can work well for code explanation, documentation, simple refactoring, and smaller development tasks.
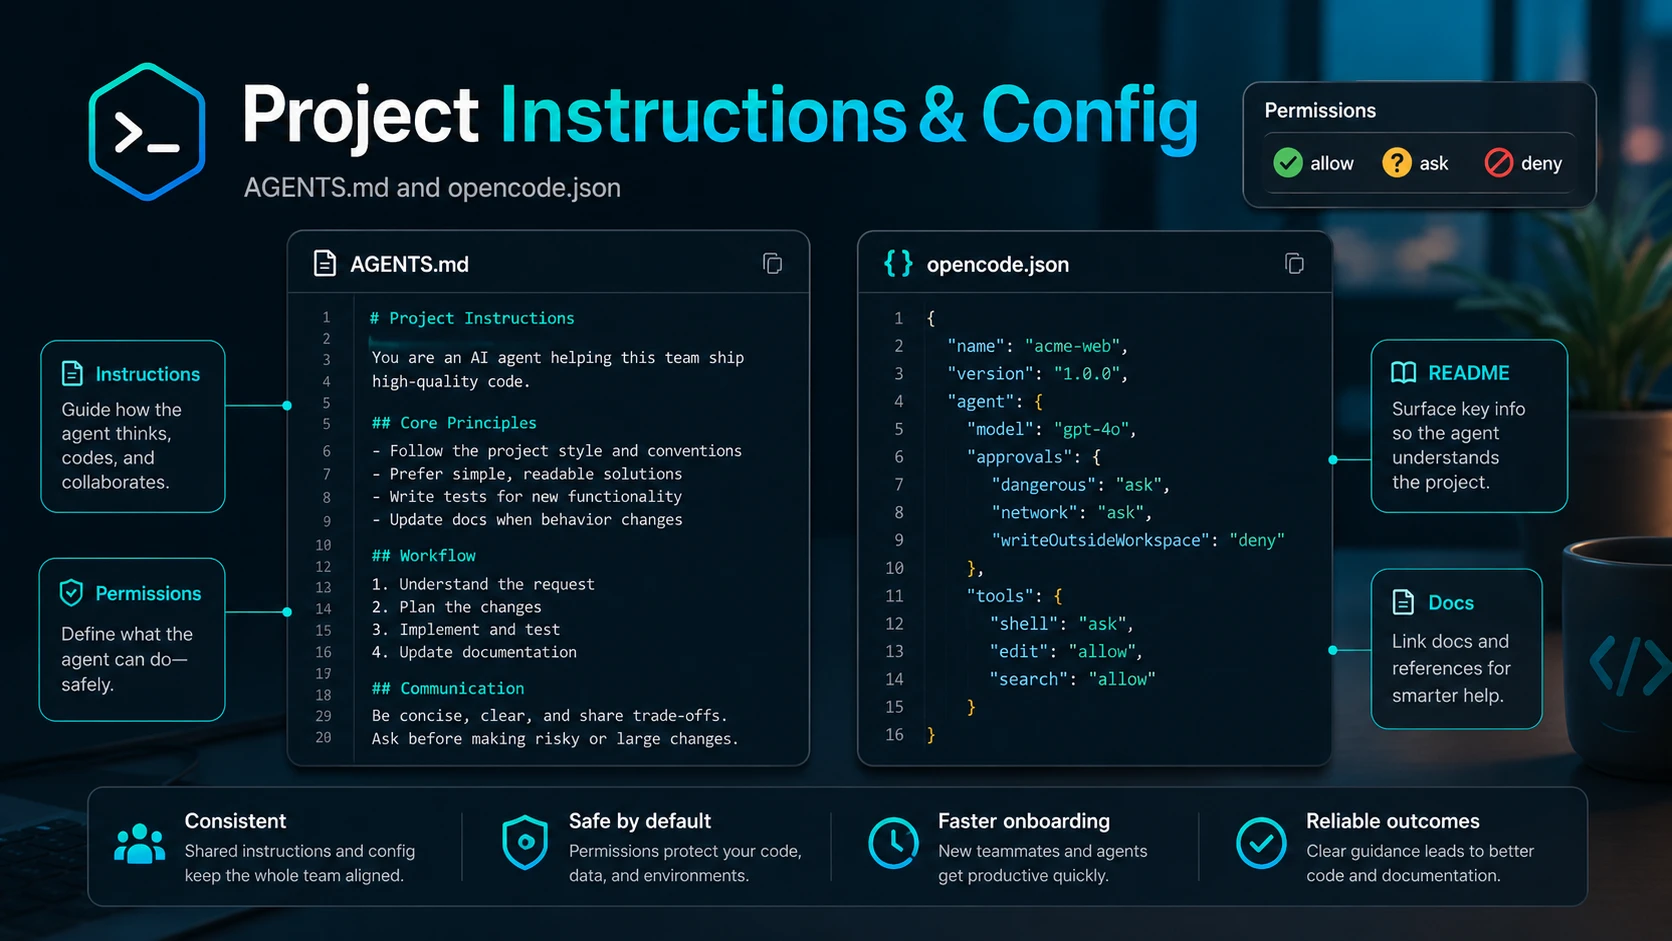
Initialize Your Project with AGENTS.md
After connecting a provider, initialize OpenCode inside your project:
/initThe /init command analyzes your repository and creates or updates an AGENTS.md file in the project root.
This file gives OpenCode project-specific guidance, such as:
Build commands
Test commands
Lint commands
Project structure
Coding conventions
Setup notes
Common gotchas
You should commit AGENTS.md to Git so your team can share the same OpenCode instructions.
You can also create or edit AGENTS.md manually. For example:
# Project Guidelines

## Code Style
- Use TypeScript strict mode.
- Prefer small functions.
- Keep business logic out of UI components.

## Testing
- Add tests for new features.
- Follow the existing test style.

## Security
- Never log secrets or API keys.
- Explain security-sensitive changes before editing.

## Workflow
- Make a plan before large edits.
- Explain every file you change.
Good project instructions make OpenCode much more consistent.
Configure OpenCode with opencode.json
OpenCode can be configured with an opencode.json or opencode.jsonc file.
For project-specific settings, place opencode.json in your project root.
Example:
{
  "$schema": "https://opencode.ai/config.json",
  "instructions": [
    "AGENTS.md",
    "README.md",
    "docs/*.md"
  ],
  "permission": {
    "*": "ask",
    "bash": "ask",
    "edit": "ask"
  }
}
This setup tells OpenCode to load your instruction files and ask before running actions such as shell commands or edits.
OpenCode supports three permission values:
allow
ask
deny
For production or sensitive projects, using "ask" for important actions is a safer default.
You can also use a global config at:
~/.config/opencode/opencode.jsonProject config can override global config, which is helpful when different projects need different rules.
Basic OpenCode Workflow
Once OpenCode is running inside your project, use it step by step.
1. Understand the project
Explain the structure of this project in simple terms.2. Find the relevant files
Find the files related to user authentication.3. Ask for a plan
I want to add password reset. First, make a plan and do not edit files yet.4. Review the plan
Check whether the plan makes sense before allowing edits.
5. Let OpenCode make changes
Implement the password reset flow based on the plan.6. Run tests
Run the relevant tests and fix any issues.This workflow is safer than asking the agent to immediately change many files. For best results, move from understanding to planning, then from planning to implementation.
Use Plan Mode Before Large Changes
OpenCode includes two main built-in agents:
| Agent | Purpose |
| build | Default full-access agent for development work |
| plan | Read-only agent for analysis and planning |
For unfamiliar codebases or risky changes, start with Plan mode.
You can switch between Build and Plan with the Tab key in the TUI.
Plan mode is useful when you want OpenCode to inspect the codebase and suggest a path forward without editing files.
Example prompt:
Analyze how authentication works in this project. Do not edit files. Give me a step-by-step plan for improving it.Once the plan looks good, switch back to Build mode and ask OpenCode to implement the change.
Common OpenCode Use Cases
OpenCode is useful for many everyday development tasks:
Explaining unfamiliar code
Finding bugs
Refactoring functions
Writing tests
Reviewing git diffs
Generating documentation
Improving error handling
Understanding project architecture
Planning new features
Here are a few practical prompts:
Review the current git diff for bugs and security issues.Add tests for this module using the existing test style.Refactor this file to make it easier to maintain. Keep behavior unchanged.Explain this error and suggest the safest fix.The best prompts are specific. Tell OpenCode what you want, which area matters, and whether it should edit files or only explain.
Troubleshooting OpenCode
“command not found: opencode”
The binary may not be in your PATH.
If you installed with the official script, add the install directory to your shell profile:
export PATH="$HOME/.opencode/bin:$PATH"Then reload your shell:
source ~/.zshrcor:
source ~/.bashrcnpm install fails
Check your Node.js version:
node --versionIf Node.js is too old, upgrade it with nvm or your preferred version manager.
Then reinstall:
npm install -g opencode-aiProvider is not connected
Inside OpenCode, run:
/connectChoose your provider and complete the setup.
To check configured credentials from the command line, you can use:
opencode auth listThen reopen OpenCode and run:
/modelsto select a model.
The terminal UI looks broken
Use a modern terminal emulator such as WezTerm, Alacritty, Ghostty, Kitty, iTerm2, or Windows Terminal.
Older terminal apps may not render modern terminal interfaces correctly.
OpenCode changes too much code
Ask it to plan first:
Do not edit files yet. Explain what you would change and why.You can also use Plan mode or set stricter permissions in opencode.json.
How to Update OpenCode
The update command depends on how you installed it.
With Homebrew:
brew upgrade opencodeWith npm:
npm update -g opencode-aiWith the official install script:
curl -fsSL https://opencode.ai/install | bashAfter updating, check the version:
opencode --versionWho Should Use OpenCode?
OpenCode is a good choice if you:
Like working in the terminal
Want an open-source AI coding agent
Want more provider flexibility
Work with local or private codebases
Prefer project-level AI assistance
Want a Claude Code alternative
Want to experiment with local models
It is especially useful for developers who already spend a lot of time in the command line.
Who Should Not Use OpenCode?
OpenCode may not be ideal if you:
Prefer a fully visual IDE-first workflow
Do not want to use the terminal
Only need autocomplete
Want the simplest possible setup
Prefer one closed model ecosystem
In those cases, Cursor, GitHub Copilot, or Claude Code may feel more familiar.
Final Thoughts
OpenCode is a practical open-source AI coding agent for developers who want more control over their AI workflow.
It runs in the terminal, works inside your local project, supports many provider setups, and can help with code explanation, planning, refactoring, testing, debugging, and review.
The fastest way to try it is:
curl -fsSL https://opencode.ai/install | bashThen open a project:
cd your-project
opencode
Connect a provider:
/connectInitialize the project:
/initStart with a safe prompt:
Explain this project structure and do not edit files yet.From there, you can move into planning, editing, testing, and real development work.
If you are looking for an open-source Claude Code alternative or a flexible AI coding agent for the terminal, OpenCode is worth trying.